Overview
This use case describes the implementation of inference samples using AWS Greengrass* and Lambdas. These Lambdas can be created, modified, or updated in the cloud and can be deployed from cloud to edge using AWS Greengrass.
This use case covers the following:
- Description of samples
- Pre-requisites for Intel edge device
- Configuring a Greengrass group
- Creating and packaging Lambda functions
- Deployment of Lambdas
- Various options to consume the inference output
Select Configure & Download to download the use case and the software listed below.

- Time to Complete: 20-30 minutes
- Programming Language: Python* 3
- Available Software: Intel® Distribution of OpenVINO™ toolkit 2021 Release
Recommended Hardware
The hardware below is recommended for use with this reference implementation. See the Recommended Hardware page for other suggestions.
Target System Requirements
- Ubuntu* 18.04.3 LTS or 20.04 LTS
- 6th to 11th Generation Intel® Core™ processors or Intel® Atom™ processors with Iris® Pro graphics or Intel® HD Graphics
- Minimum 4 GB RAM and 30 GB storage memory
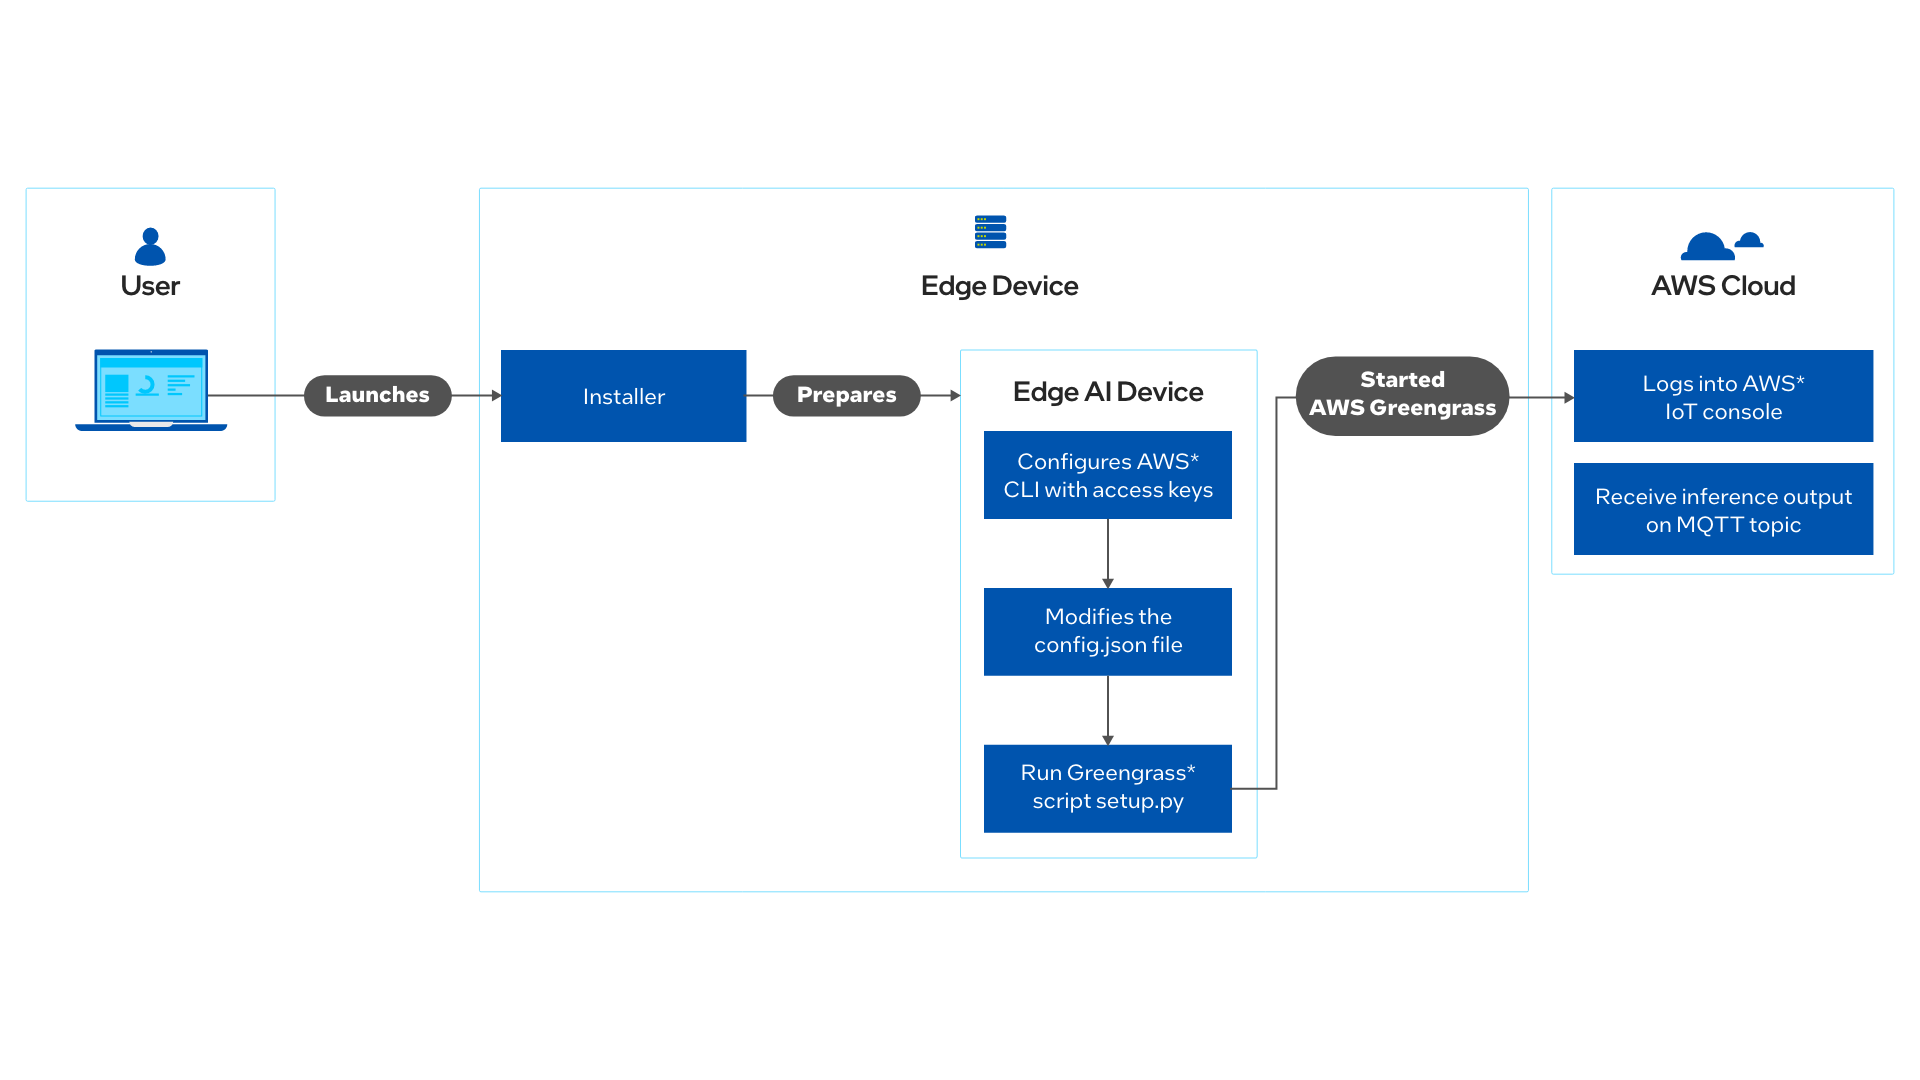
How It Works
The application uses the inference engine included in the Intel® Distribution of OpenVINO™ toolkit and enables cloud developers to deploy inference functionalities on Intel IoT edge devices with accelerators.
These functions provide a seamless migration of visual analytics from cloud to edge in a secure manner using AWS Greengrass.
Get Started
Step 1: Install the Use Case
Select Configure & Download to download the use case and then follow the steps below to install it.
1. Open a new terminal, go to the downloaded folder and unzip the downloaded package.
unzip aws_cloud_to_edge_pipeline.zip
2. From the directory where you have unzipped the downloaded package, navigate to the aws_greengass_usecase/ directory.
cd aws_cloud_to_edge_pipeline/
3. Change permission of the executable edgesoftware file.
chmod 755 edgesoftware
4. Run the command below to install the use case.
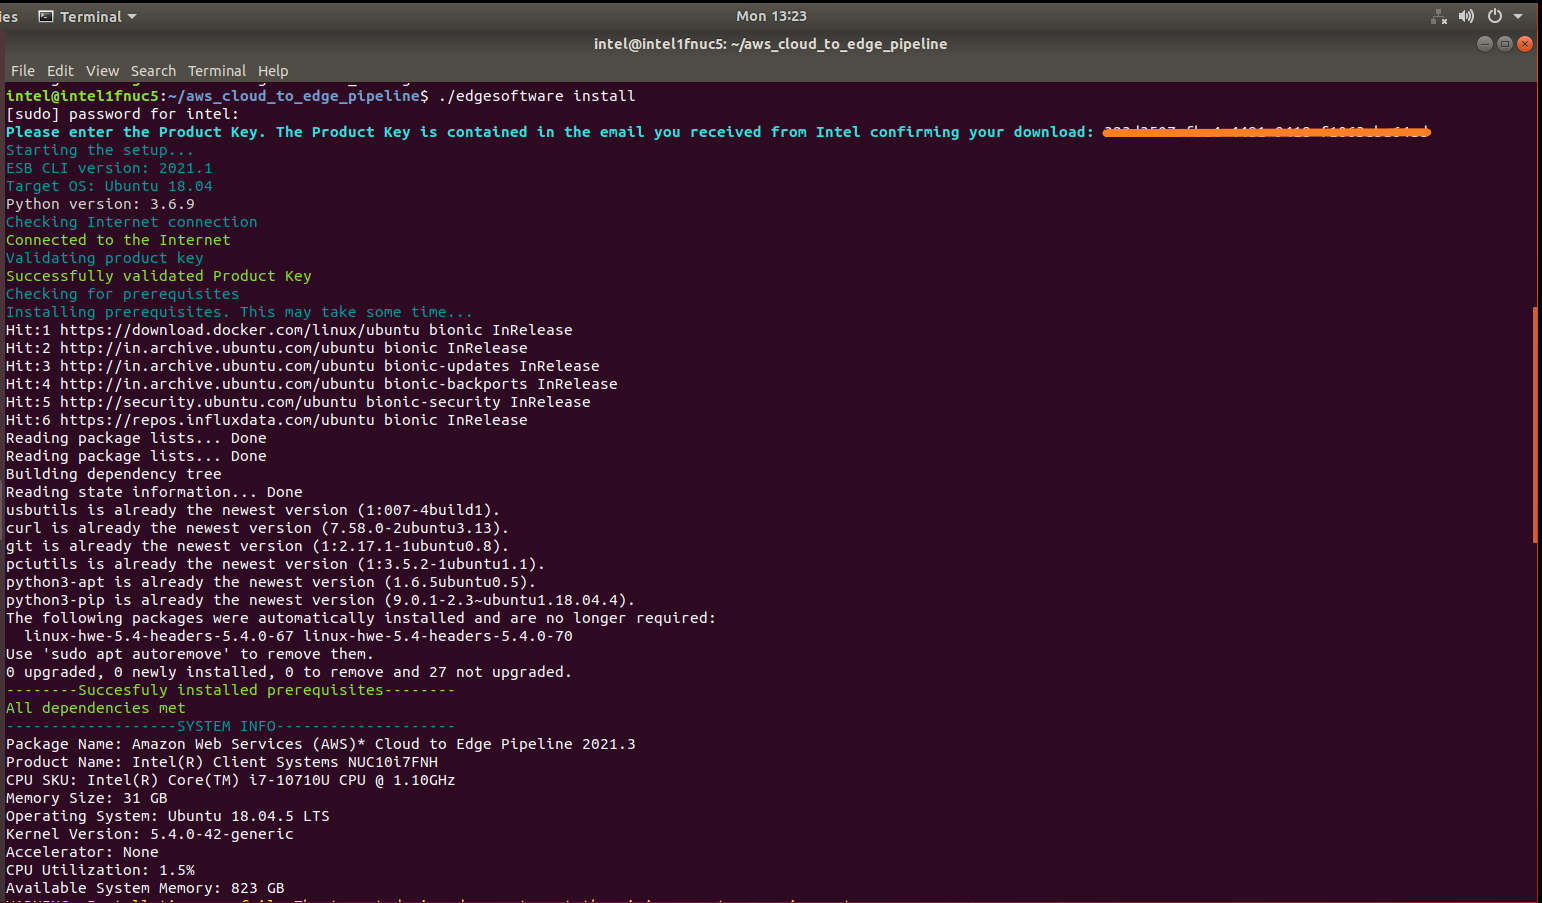
./edgesoftware install
5. During the installation, you will be prompted for the Product Key. The Product Key is contained in the email you received from Intel confirming your download.
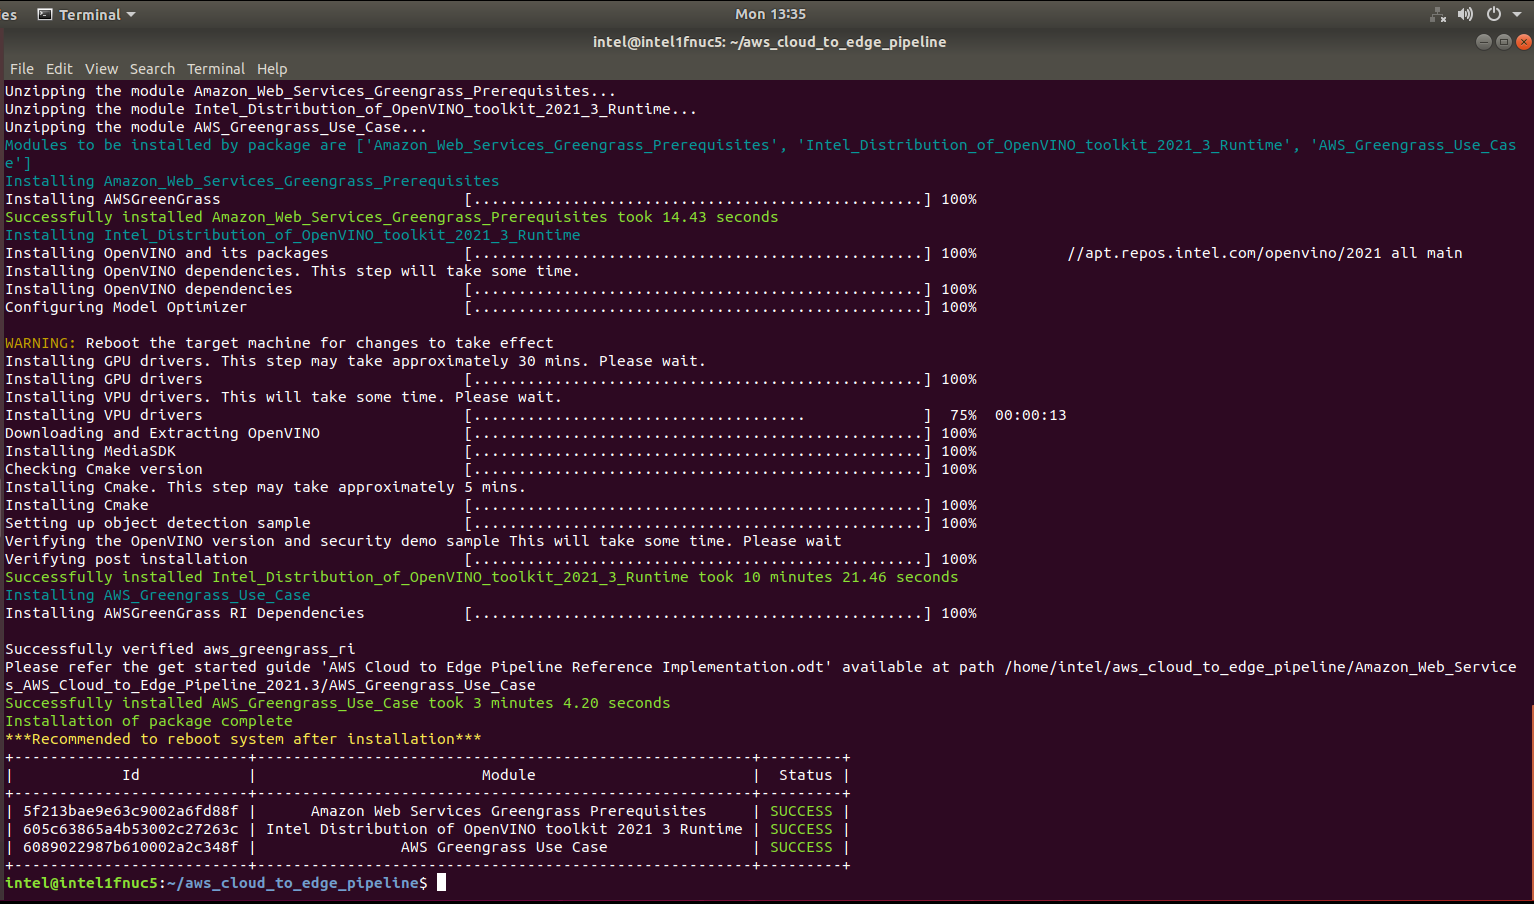
6. When the installation is complete, you see the message “Installation of package complete” and the installation status for each module.
7. AWS Greengrass use case is available in the target system at:
cd <install_directory>/aws_cloud_to_edge_pipeline/Amazon_Web_Services_AWS_Cloud_to_Edge_Pipeline_<version>/AWS_Greengrass_Use_Case/aws_greengrass_usecase/
NOTE: is the OpenVINO version.
Step 2: Set up the Environment
NOTE: Run the following commands on the same terminal where you did the steps above, unless specified to open a new terminal.
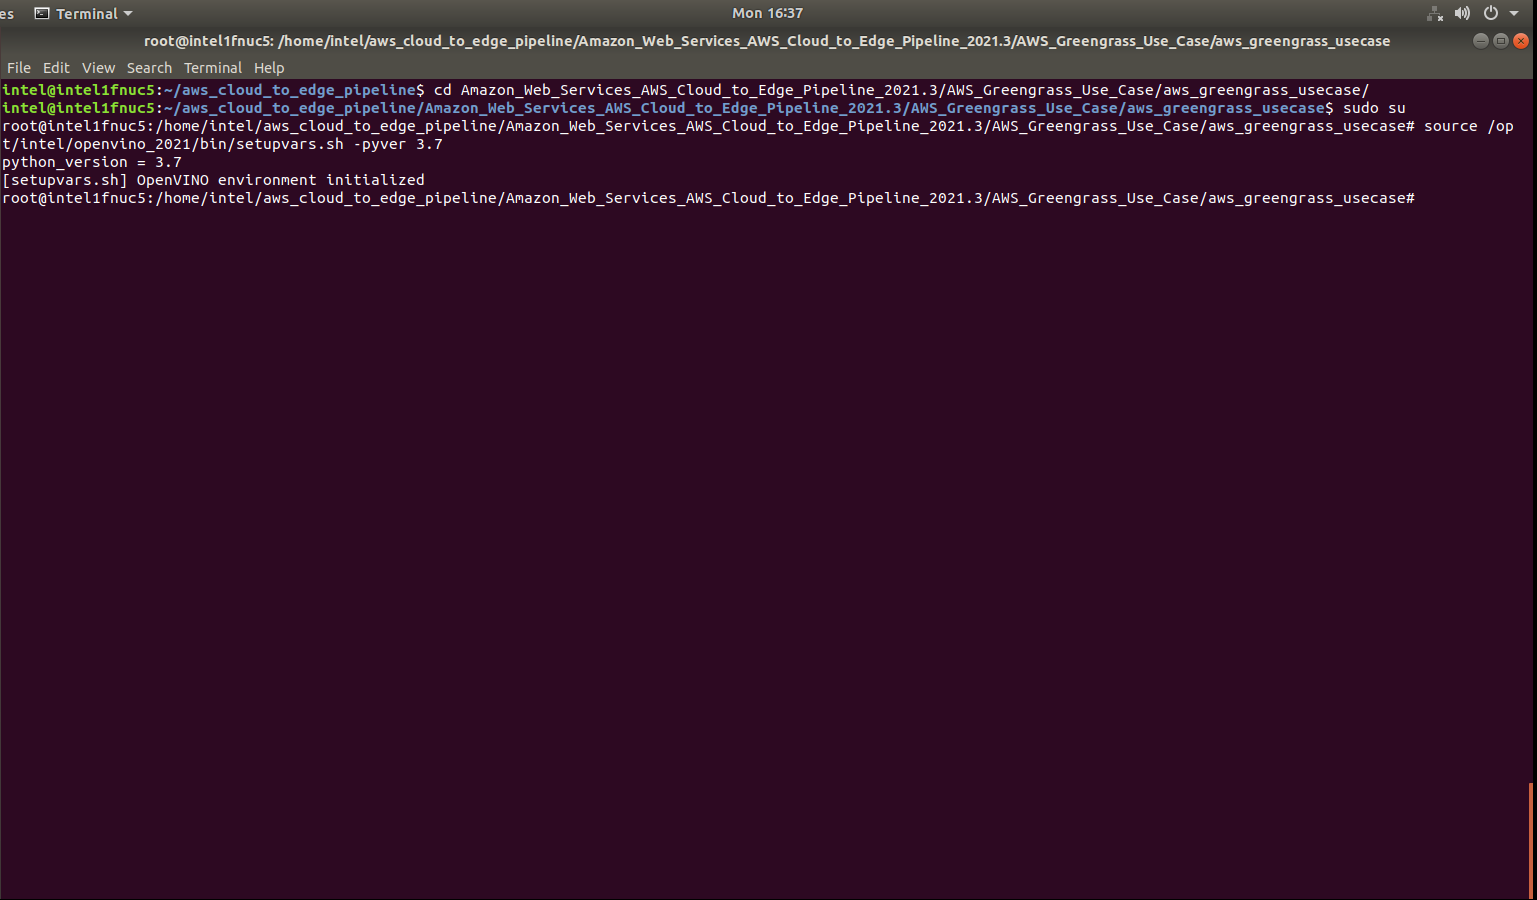
- Enter in root directory.
sudo su - Configure the environment to use the Intel® Distribution of OpenVINO™ toolkit.
source /opt/intel/openvino_2021/bin/setupvars.sh -pyver 3.7
Run the Application
Step 1: Generate Access Key and Secret Access Key
- Go to AWS console and login with the AWS credentials.
- Click on Services in the top left corner
- Select IAM.
- Go to Creating an IAM User in your AWS account and follow the steps to generate access key and secret access key.
NOTE: In AWS access type, select both programmatic access and console access. Attach AdministratorAccess Policy to the User.
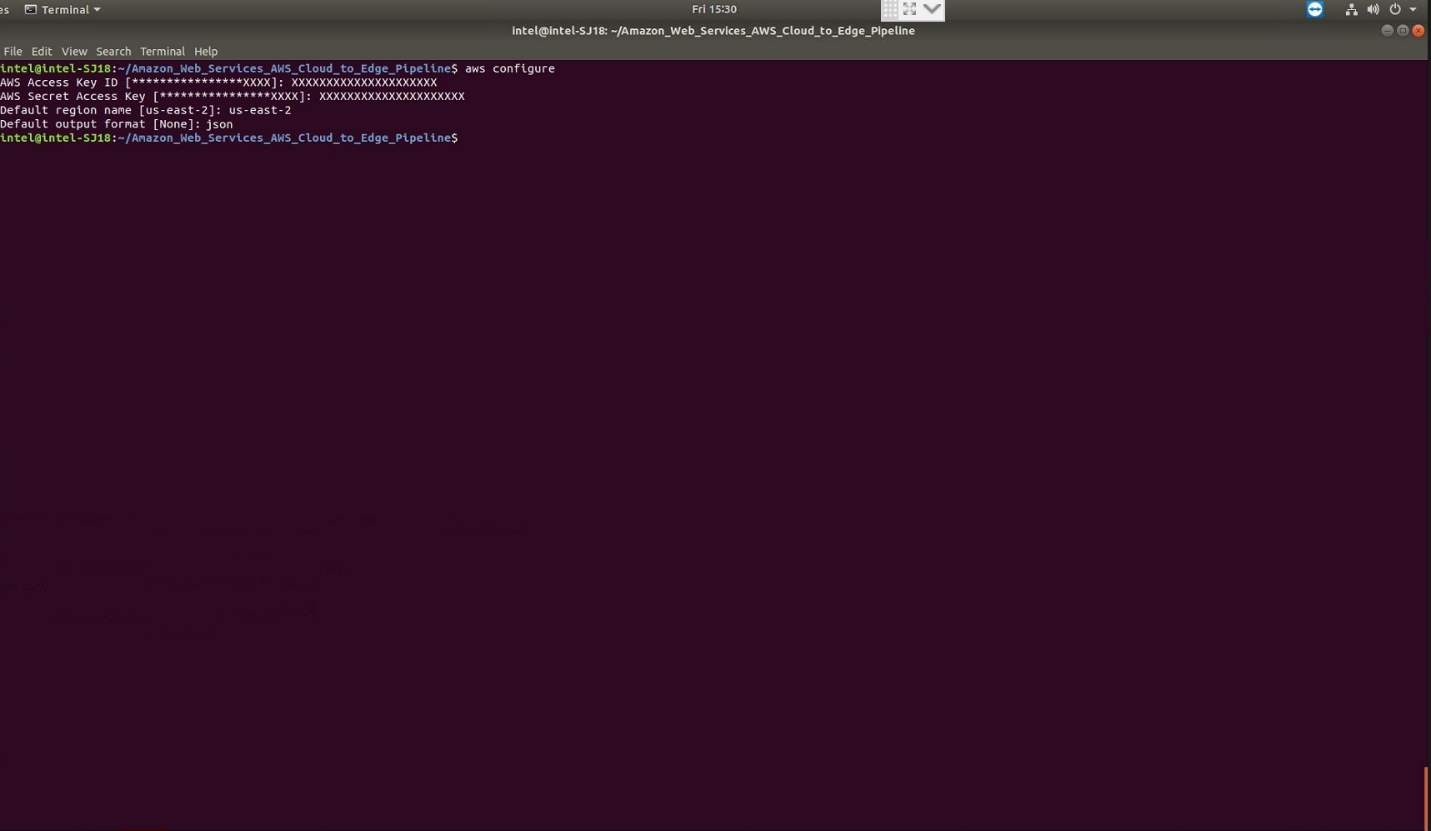
Step 2: Configure AWS CLI
Execute the following command.
aws configure
Provide the access key and secret access key generated in Step1 and the additional details as shown below:
Step 3: Configure the Application
The config.json file contains all the necessary configurations including the path to default models and input video. If you wish to change the input, edit config.json and add the required information using the following steps:
1. From the aws_greengrass_usecase directory open the config.json file.
2. The role of elements in the config.json file are:
- GREENGRASS_REGION: Region where greengrass service will run.
NOTE: Region entered while AWS configured and region specified in config.json must match.
- GREENGRASS_THING_NAME: Name of the edge device.
- GREENGRASS_CORE_NAME: Name of your Greengrass core.
- GREENGRASS_GROUP_NAME: Name of your Greengrass group.
- GREENGRASS_POLICY_NAME: Name of your Greengrass policy.
- LAMBDAS: List of lambdas to be attached to Greengrass group. For each lambda below elements must be configured:
- LAMBDA_FILE_NAME: Name of the AWS Lambda file.
- LAMBDA_FUNCTION_NAME: Name of the AWS Lambda function.
- ENVIRONMENT_VARIABLES: Add any key-value pair to be configured as environment variables. The elements below are must for each lambda:
- PARAM_DEVICE: Device to be used for inferencing (Choose CPU/GPU/HDDL).
-
NOTE: Make sure that the hardware is available on the system before mentioning them.
- LOGS_TOPIC: MQTT topic where the logs will be published.
- DATA_TOPIC: MQTT topic where the inference data will be published.
- PARAM_MODEL_XML: Path to the model.
- PARAM_INPUT_SOURCE: Name of the input video file.
-
NOTE: Always place the input video files in ‘/resources’ folder.
To use camera stream instead of video, replace the video file name with /dev/video0. - PARAM_LABELMAP_FILE: label file name for the lambda.
-
NOTE: The label file should always be placed in the same directory as the lambda file.
Step 4: Run the AWS Greengrass Cloud and Device Setup
Execute the command below to run the application.
python3.7 setup.py --config_file config.json
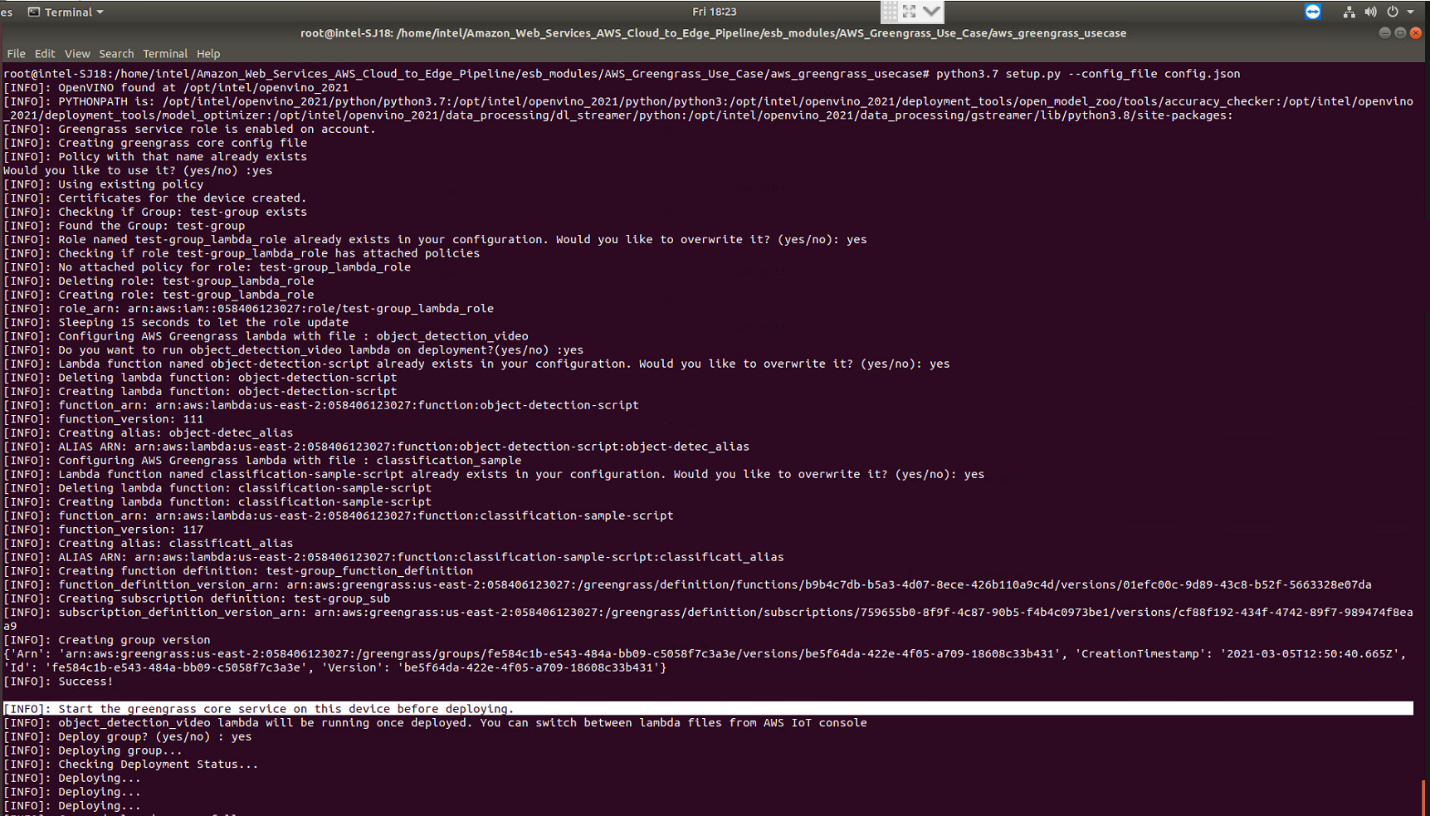
Once the certificates are downloaded in the step above, success message will be displayed on the terminal and you will be prompted with a “Deploy group? (yes/no)” message.
Before deploying the group, open a new terminal and run the command below to start the Greengrass service.
sudo /greengrass/ggc/core/greengrassd start
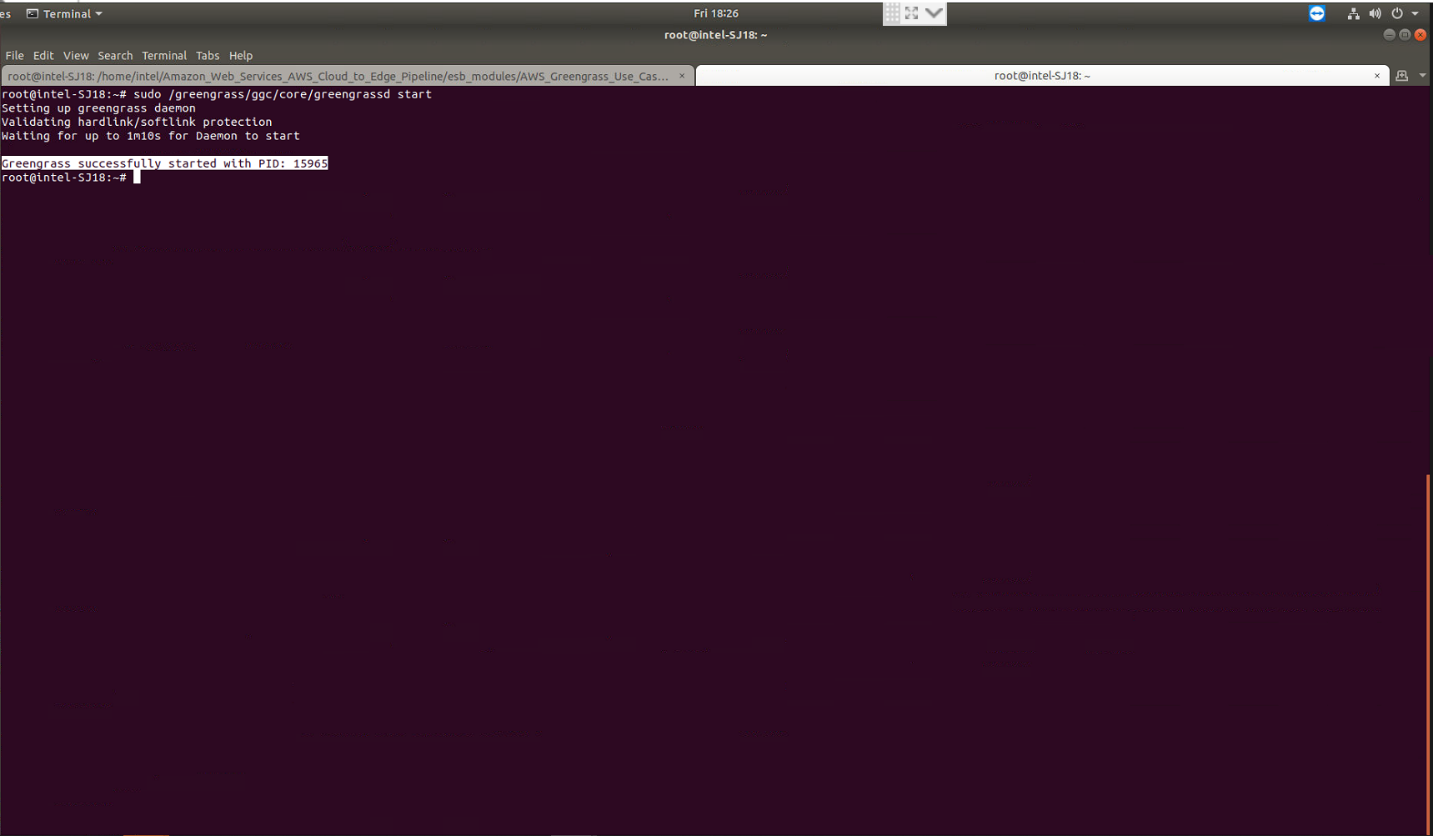
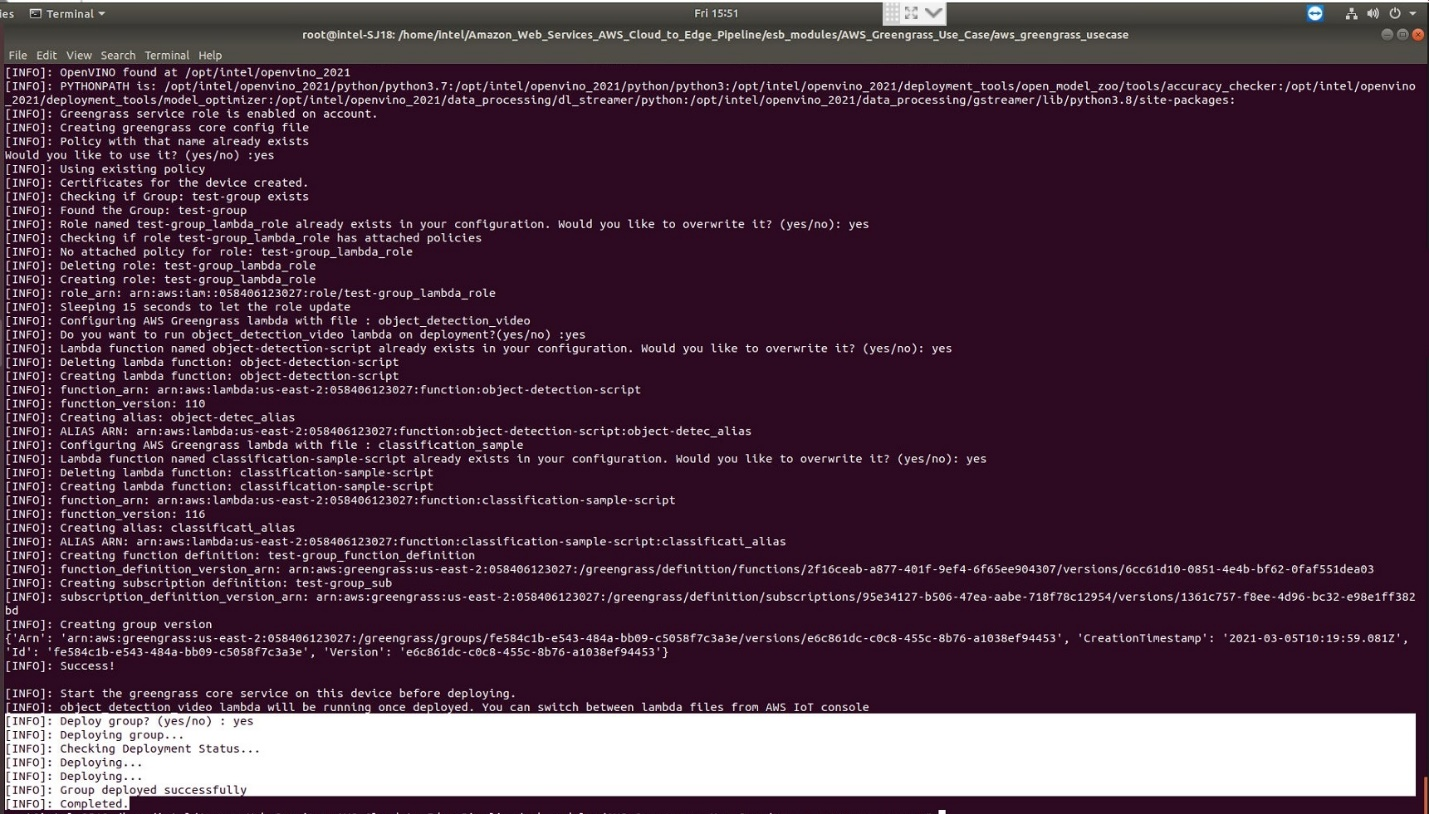
Once the Greengrass service is started, go back to the previous terminal. You can now type yes to the “Deploy group? (yes/no)” message and press Enter. The successful deployment will look like the image shown below.
Step 5: Subscribe and Publish Data to Topic
1. Go to AWS console.
2. Search and select Iot Core.
3. Click on Test in the left panel.
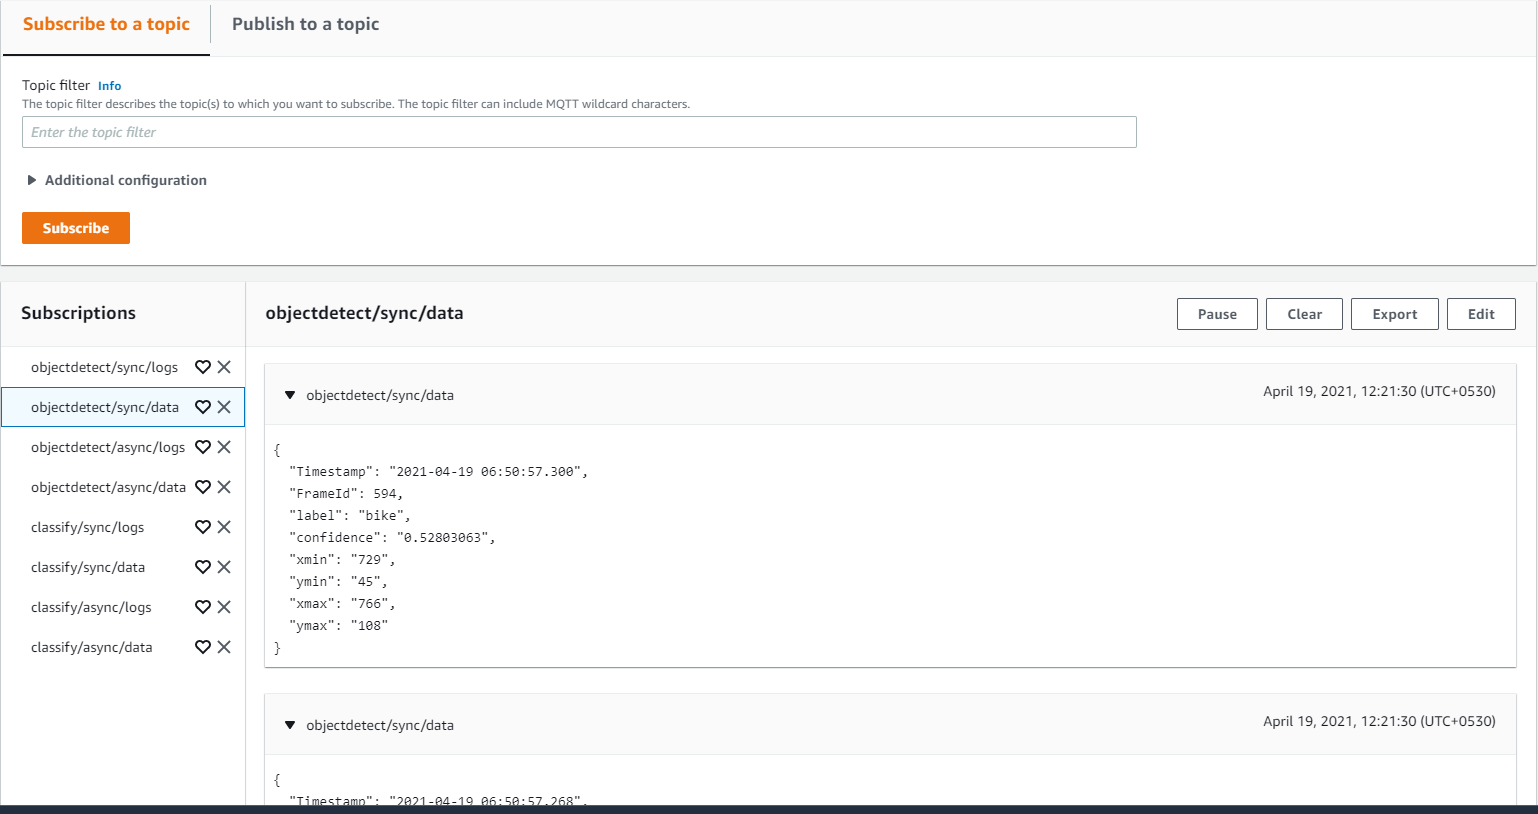
4. Enter Lambda topic from config.json to Subscription topic text box and click on Subscribe to a topic.
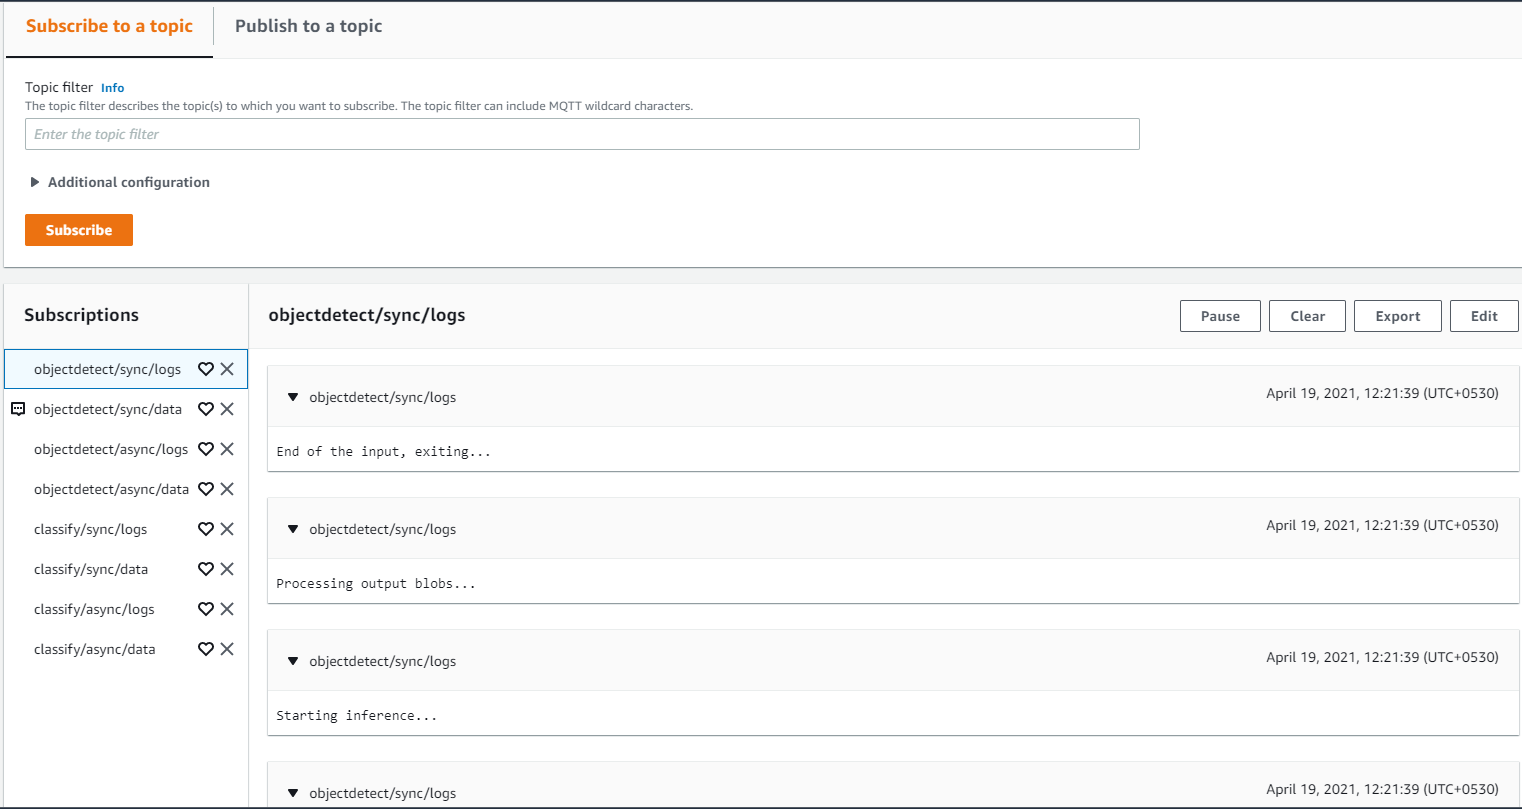
NOTE: The logs are published to /logs and inference output data will be published to /data
Step 6: Switch Between Different Lambdas
-
Go to AWS IoT console.
-
Search and select Iot Core.
-
From the left panel, click on “Greengrass”, then click on “Classic (V1)” and select “Groups”.
-
Click on the group name. (Group name can be obtained from the config.json.)
-
Go to "Actions" tab and select "Reset Deployments". Wait for successful reset.
-
Go to Lambdas tab inside selected group. Select the Lambda that is currently running.
-
Select Edit configurations and set the Lifecycle function to On-demand function. Click on Update.
-
Go to Lambdas tab inside selected group. Select the Lambda you wish to run now.
-
Select Edit configurations and set the Lifecycle function to Make this function long-lived and keep it running indefinitely. Click on Update.
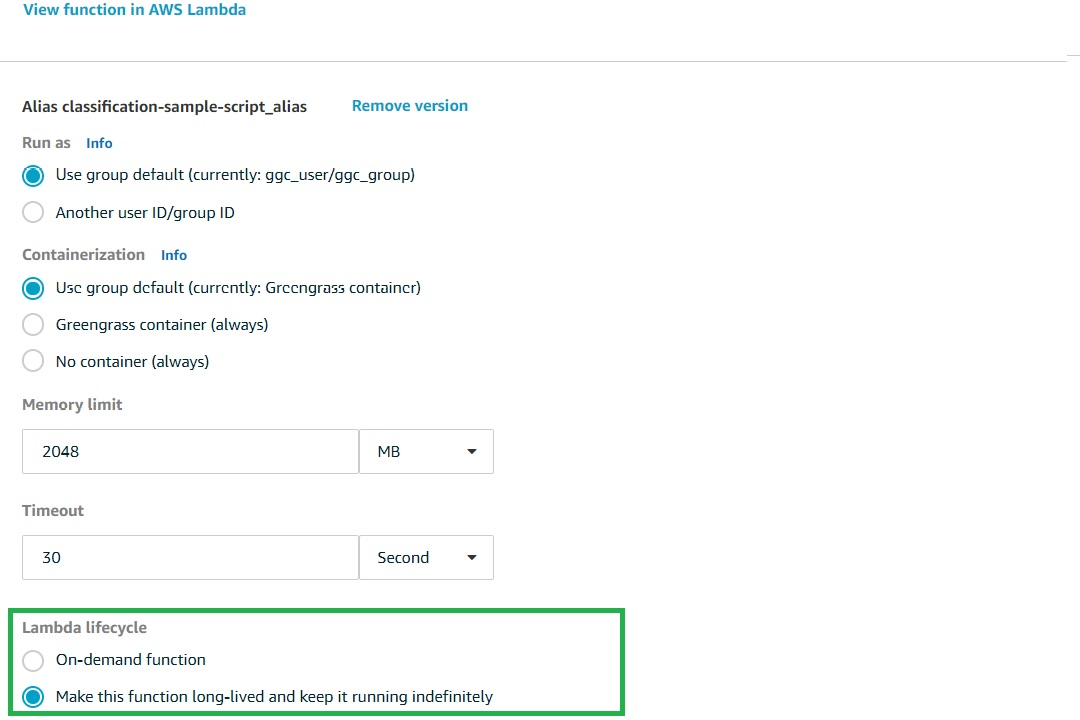
Figure 11: Switching Between Lambdas -
All the updates are done. Go to "Actions" and select "Deploy group". Wait for successful deployment.
- Go to AWS IoT Core MQTT broker and subscribe to the topic. The inference outputs are received here for the selected Lambda.
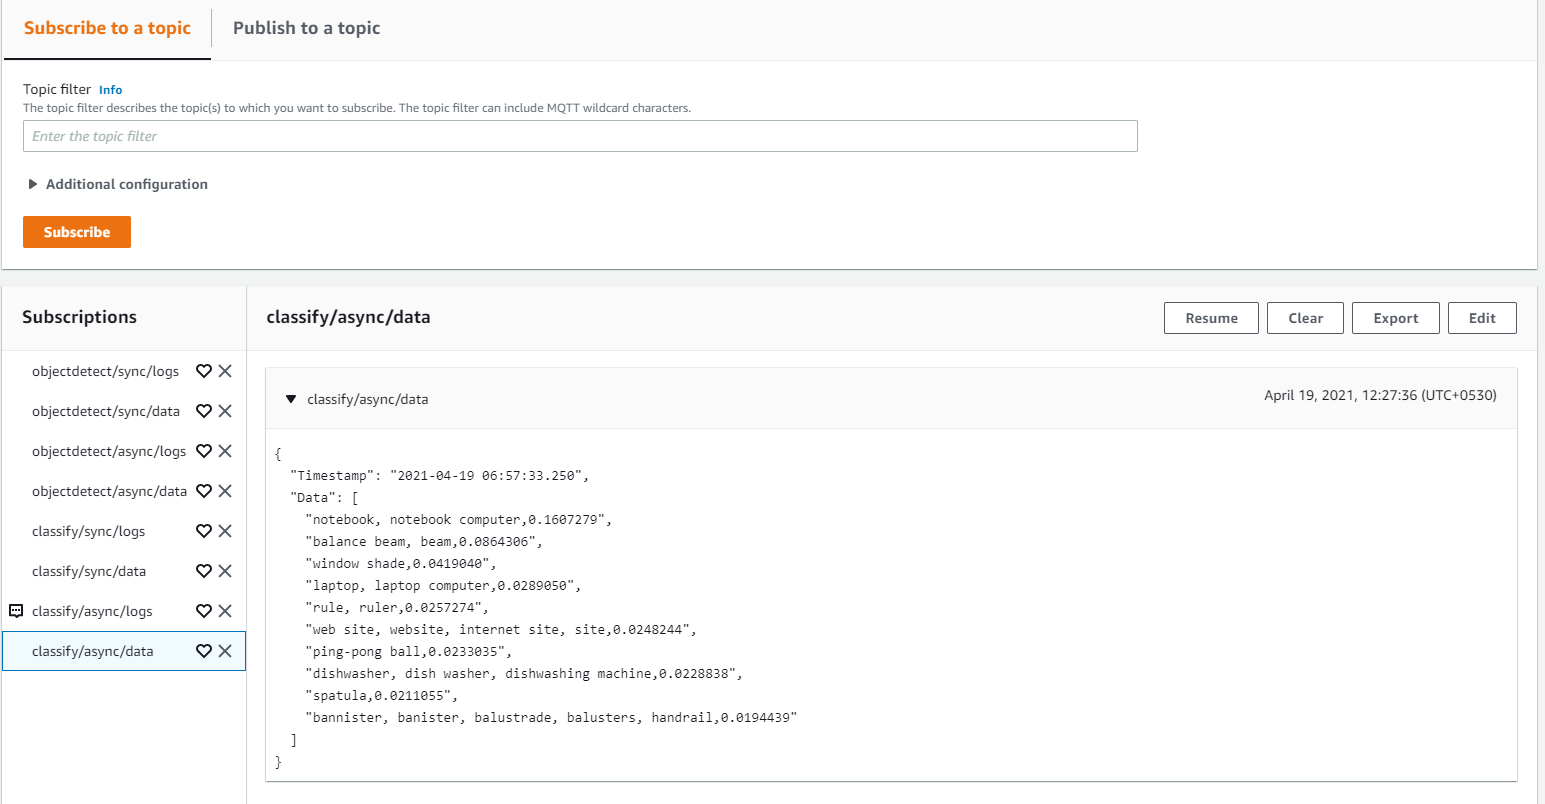
Figure 12: Subscribing to Topic at Console
Step 7: Switch Between Different Devices
- Go to AWS IoT console.
- Search and select Iot Core.
- From the left panel, click on "Greengrass", then click on "Classic (V1)" and select "Groups".
- Click on the group name (Group name can be obtained from the config.json).
- Go to "Actions" tab and select "Reset Deployments". Wait for successful reset.
- Go to Lambdas tab inside selected group. Select the Lambda that is currently running.
- Select Edit configurations and under Environment variables go to "Key" and set PARAM_DEVICE to the target device (CPU/GPU/HDDL). Click on "Update".
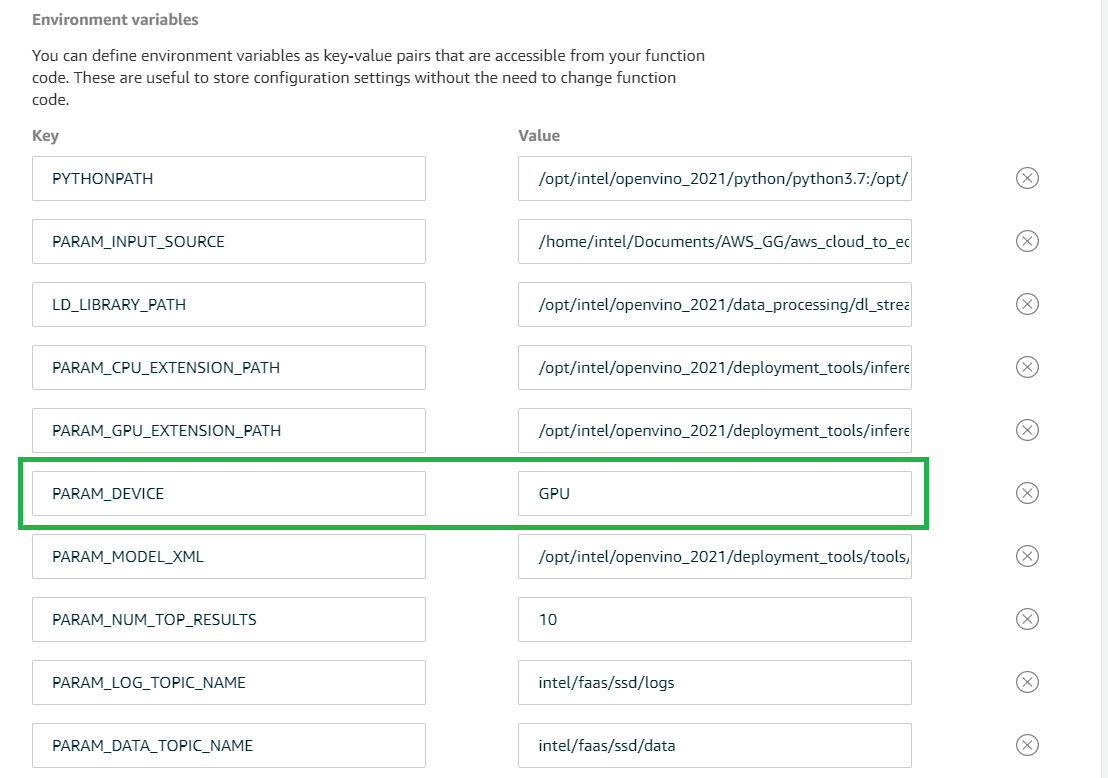
Figure 13: Selecting Target Device - All the updates are done. Go to "Actions" and select "Deploy group". Wait for successful deployment.
- Go to AWS IoT Core MQTT broker and subscribe to the topic. The inference outputs are received here for the updated target device.
Note: Installation logs can be found at the below path once the group is deployed (the user needs to be in root environment to access the logs):
/greengrass/ggc/var/log/
Troubleshooting
Reinstall Failure
If you are trying to reinstall the package and encounter the below issue (as shown in the image), it can be resolved using the following command:
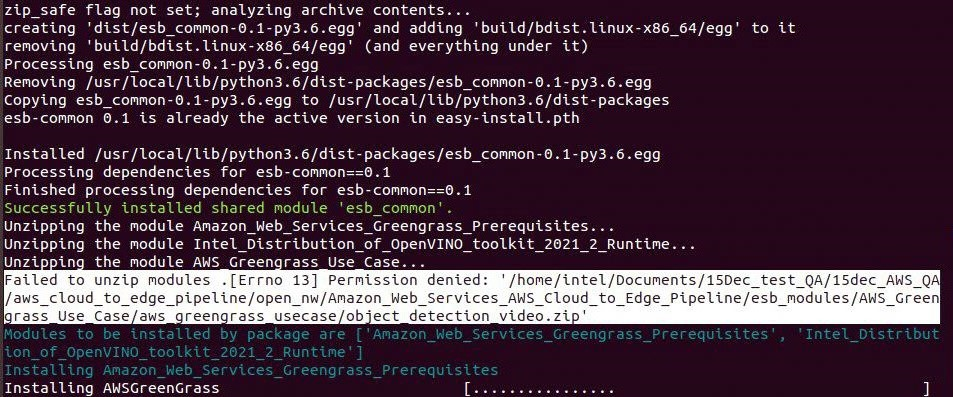
Solution:
sudo rm <install_directory>/aws_cloud_to_edge_pipeline/Amazon_Web_Services_AWS_Cloud_to_Edge_Pipeline_<version>/AWS_Greengrass_Use_Case/aws_greengrass_usecase/<lambda_file_name>.zip
Unable to See Messages at the Console
After successful deployment, if you are unable to see messages at the console, check the log file. One such known issue is numpy version mismatch, which can be resolved using commands below.
Solution:
sudo su
python3.7 -m pip uninstall numpy
python3.7 -m pip install numpy
Components Fail to Start on Executing ./greengrassd start
If some components fail to start on executing ./greengrassd start:
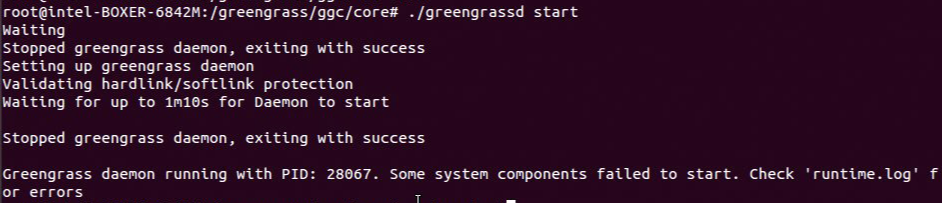
Solution:
systemctl stop docker.service
./greengrassd start Fails Due to address already in use
If ./greengrassd start fails due to address already in use:
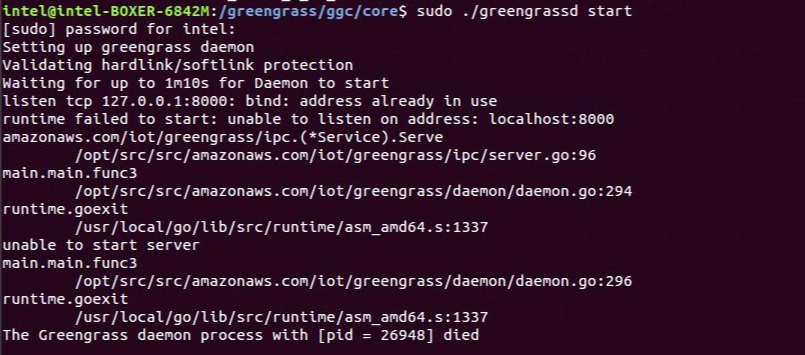
Solution:
sudo netstat -tulpn | grep 8000
sudo kill -9 <port-number>
Lambda log error: HDDL not initialized
When giving PARAM_DEVICE as HDDL and not receiving any output on /data topic, check the logs on the system for that lambda with the command:
tail -f /greengrass/ggc/var/log/user/<region>/<account id>/<lambda name>.log
Check for any log saying HDDL not initialized as shown below:

Solution:
In a new terminal, enter the commands:
source /opt/intel/openvino/bin/setupvars.sh
${HDDL_INSTALL_DIR}/install_IVAD_VPU_dependencies.sh
Reboot the system.
Support Forum
If you're unable to resolve your issues, contact the Support Forum.
Summary and Next Steps
This application successfully implements inference samples using AWS Greengrass and Lambdas. The inference output can be visualized at AWS IoT Core MQTT topic post deployment.
As a next step, the use case can be extended to perform analytics using AWS services such as Elasticsearch* and Kibana*.
Learn More
To continue your learning, see the following guides and software resources:
● Intel® Distribution of OpenVINO™ toolkit Documentation
*You are responsible for payment of all third-party charges, including payment for use of Amazon Web Services (AWS).